I realized that something so simple shouldn’t be this confusing. But Google Docs somehow makes it confusing by hiding margin settings in three different places.
Here’s the thing – changing margins in Google Docs is actually easy once you know where to look. The problem is nobody tells you about all the methods, or when to use each one. So let me save you those 20 minutes of frustration.
Why Margins Matter More Than You Think
Before we dive into the how, let’s talk about why you’d even want to change margins. Because if you’re like me, you probably ignored them for years.
Academic Requirements Remember getting points deducted for wrong margins in college? Yeah, me too. Most academic papers require 1-inch margins all around. Some professors want 1.5 inches. Miss this detail, lose points. Simple as that.
Professional Documents Resumes need tight margins to fit everything on one page. Business letters need wider margins to look professional. Proposals need specific margins to match company templates.
Readability Issues Default Google Docs margins are fine for screen reading. But printed? Text runs too close to edges. Looks unprofessional. And some printers literally can’t print that close to the edge – you’ll lose words.
Page Count Manipulation Let’s be honest. Sometimes you need to make that essay look longer. Or squeeze that resume into two pages instead of three. Margins are your secret weapon.
Method 1: The Quick and Dirty Way (Page Setup)
This is the method most people know. It’s not the fastest, but it’s the most obvious.
Step by Step:
- Open your Google Doc
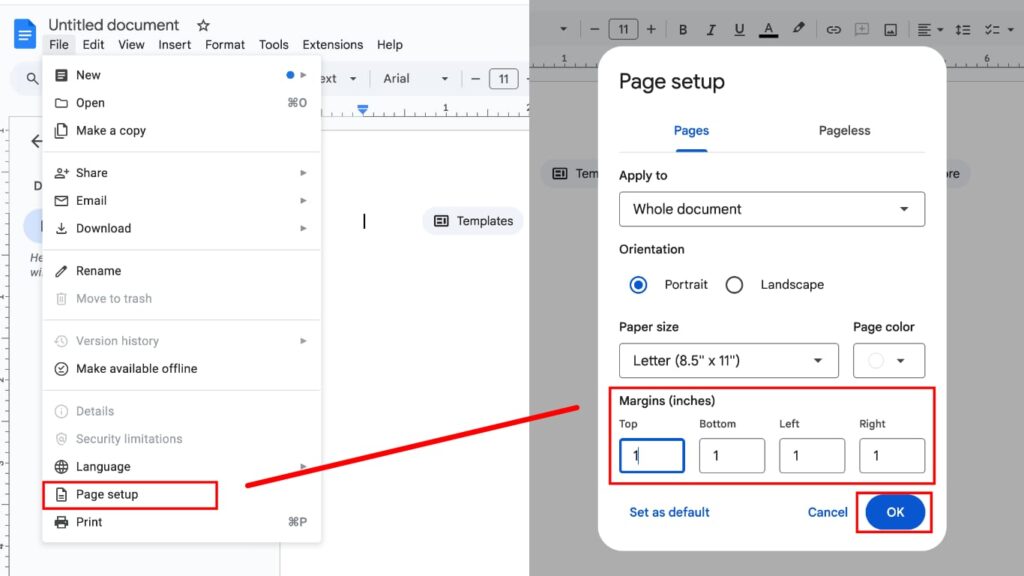
- Click “File” in the menu bar
- Select “Page setup” (near the bottom)
- See those four boxes? Top, Bottom, Left, Right
- Type your measurements
- Click “OK”

What the numbers mean:
- Default is 1 inch all around
- Numbers are in inches (or centimeters if you’re metric)
- You can go as low as 0 (though your printer will hate you)
- Maximum is basically the page size
Pro tip: Click “Set as default” if you want these margins for all new documents. Saved me hours of repetitive clicking.
When to use this method:
- Changing all margins at once
- Setting specific measurements
- Making it default for future docs
- When you have time to click through menus
Method 2: The Visual Method (Ruler Drag)
This is my favorite method because you can see what you’re doing in real-time. No guessing if 0.75 inches is enough – you just drag until it looks right.
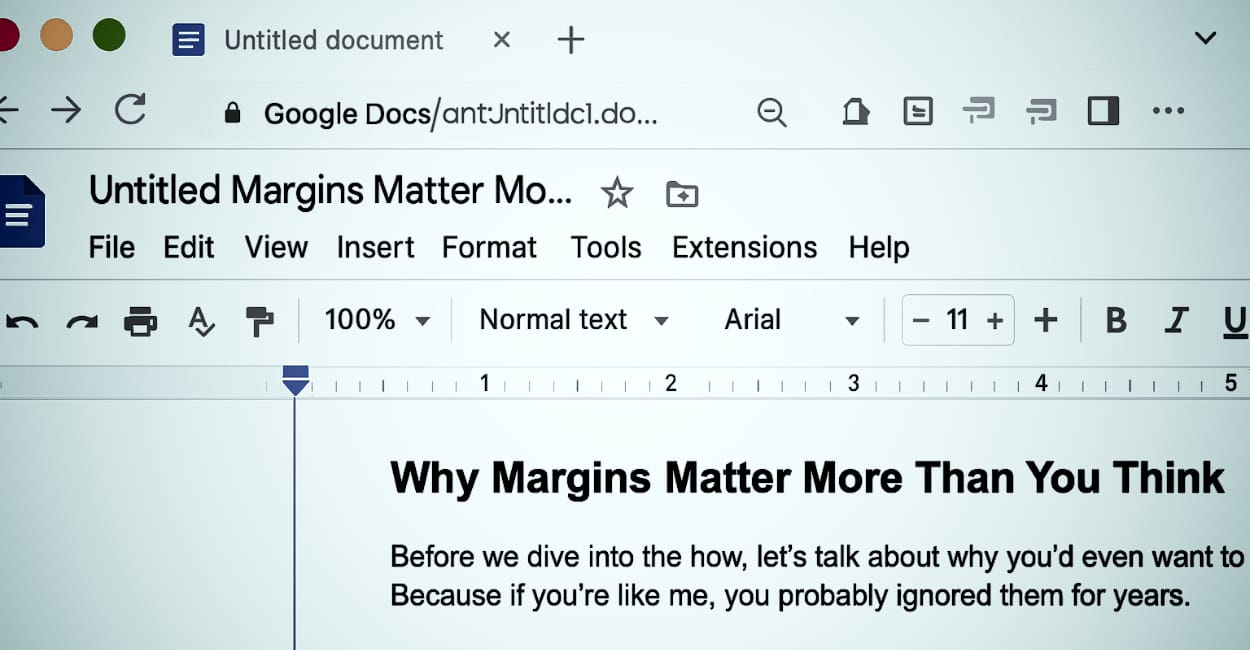
How to enable the ruler: First, make sure ruler is visible. Go to View → Show ruler. If there’s no checkmark, click it.
How to drag margins:
- Look at the ruler at top of document
- See that gray area and white area? The border is your margin
- Hover over the boundary – cursor becomes double arrow
- Click and drag left or right
- Watch your text reflow instantly

For vertical margins:
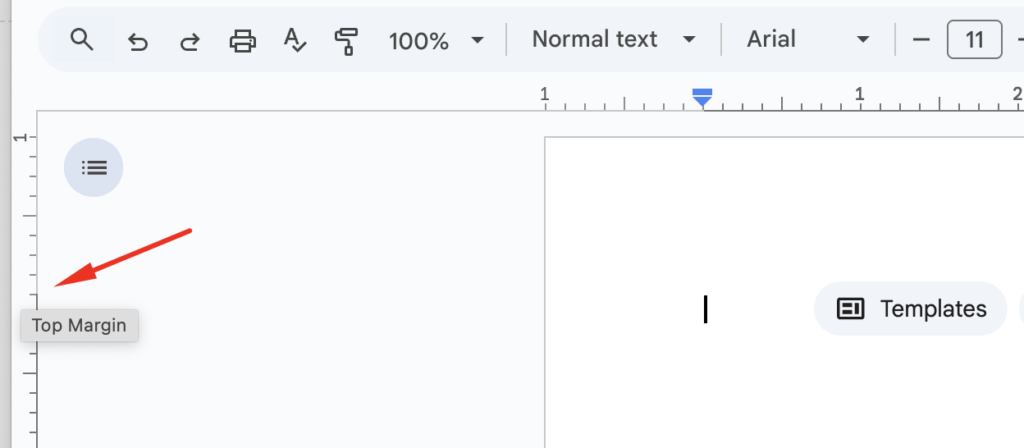
- Look at ruler on left side
- Same gray/white boundary
- Drag up or down
- Text adjusts immediately

The hidden section break trick: If you only want to change margins for part of your document:
- Place cursor where you want change to start
- Insert → Break → Section break
- Now drag margins – only affects this section
Warning: Sometimes the ruler gets glitchy. If dragging isn’t working, refresh the page. Google Docs quirk.
Method 3: The Keyboard Shortcut Method
Technically, there’s no direct keyboard shortcut for margins. But here’s the fastest keyboard-only method:
- Alt + F (opens File menu) – Windows
- Press ‘S’ (jumps to Page Setup)
- Tab through the margin fields
- Type your numbers
- Enter to save
On Mac:
- Control + Option + F (File menu)
- Arrow down to Page Setup
- Enter
- Tab and type
- Enter
Takes 5 seconds once you get the rhythm.
Method 4: The Template Method
If you’re constantly switching between different margin setups, templates are your friend.
Creating a margin template:
- Set up your margins once
- File → Save as template
- Name it something obvious like “Narrow Margins” or “APA Format”
- Next time: New → From template → Your template
My template collection:
- “Resume” – 0.5 inch all around
- “Academic” – 1 inch standard
- “Letter” – 1.25 inch for professional look
- “Maximum Text” – 0.3 inch when desperate
Special Situations and Solutions
Different First Page Margins
Need different margins on first page? Like for letterhead or title page?
- Insert → Break → Section break at end of first page
- Click in first section
- Change margins using any method
- Second section keeps original margins
Landscape Orientation Margins
Switching to landscape? Margins get weird. What was left becomes top.
- File → Page setup
- Choose “Landscape”
- Adjust margins (remember rotation)
- What looks like “left” margin is actually top when printed
Mirror Margins for Book Printing
Planning to print double-sided like a book? You need mirror margins.
Unfortunately, Google Docs doesn’t have true mirror margins. Workaround:
- Set larger left margin for odd pages
- After writing, manually adjust even pages
- Or just use Microsoft Word for this (it hurts to say, but it’s true)
Headers and Footers vs Margins
Confusion alert: Headers and footers have their own spacing, separate from margins.
- Margins: Edge of paper to text
- Header space: Top margin to header
- Footer space: Bottom margin to footer
Adjust these in Format → Headers & footers → More options
Common Margin Problems and Fixes
“My text is cut off when printing”
Your margins are smaller than printer minimum. Most printers need at least 0.25 inch margins. Some need 0.5 inch. Solution: Increase margins to 0.5 inch minimum.
“Margins look different on different computers”
Check these things:
- Zoom level (should be 100%)
- Browser (Chrome works best with Google Docs)
- Default printer settings
- Screen resolution
“I can’t select the ruler margins”
Three possible issues:
- Ruler not enabled (View → Show ruler)
- Document in suggestion mode (switch to editing)
- Browser zoom not at 100%
“Margins reset when I reopen document”
You’re probably in template or view-only mode. Make sure you have edit access and you’re working on your copy, not the template.
Standard Margin Sizes for Different Documents
Let me save you some Googling. Here are standard margins for common document types:
Academic Papers (MLA/APA)
- All margins: 1 inch
- Some professors want 1.25 for easier comments
Business Letters
- Top: 2 inches (for letterhead)
- Bottom: 1 inch
- Left and Right: 1.25 inches
Resumes
- All margins: 0.5 to 0.75 inches
- Never less than 0.5 (looks cramped)
- One-page resume: 0.5 inch
- Two-page with space: 0.75 inch
Novels/Books
- Top: 0.75 inch
- Bottom: 0.75 inch
- Inside: 0.875 inch
- Outside: 0.75 inch
Screenplays
- Top: 1 inch
- Bottom: 0.5 to 1 inch
- Left: 1.5 inches
- Right: 1 inch
Legal Documents
- All margins: 1 inch minimum
- Some courts require 1.5 inches
Advanced Tips Most People Don’t Know
The Custom Page Size Trick
Need margins that total specific page dimensions? Change page size instead:
- File → Page setup
- Paper size dropdown
- Custom
- Enter dimensions
- Now normal margins work within custom size
The PDF Export Margin Fix
PDFs sometimes add extra margins. Fix:
- File → Print
- Destination: Save as PDF
- More settings
- Margins: None
- This removes PDF-added margins, keeps your Doc margins
The Comment Space Problem
Comments eat into your margin space visually. When printing:
- Click three dots menu
- Select “Print without comments”
- Or hide comments before printing
The Mobile App Limitation
Google Docs mobile app can’t change margins. At all. Your options:
- Use mobile browser in desktop mode
- Wait until you’re at computer
- Use templates with pre-set margins
My Personal Margin Setup
After years of fighting with margins, here’s what I do:
Default setup:
- 1 inch all around (works for 90% of documents)
- Ruler always visible
- Three templates ready to go
Quick adjustments:
- Resume mode: Ctrl+A, then drag ruler to 0.5
- Academic mode: Already default
- Maximum text: Template with 0.3 inch
Time saved: About 5 minutes per document. Sounds small, but that’s hours per year.
The Bottom Line
Changing margins in Google Docs is simple once you know where to look. File → Page setup for precise control. Ruler dragging for visual adjustment. Templates for repeated use.
Don’t overthink it. Most documents work fine with 1-inch margins. When you need something different, you now have four methods to choose from.
Pick the method that matches your workflow:
- Visual person? Use the ruler
- Precise measurements? Use Page setup
- Keyboard warrior? Use shortcuts
- Repeat user? Make templates
And remember – margins might seem like a tiny detail, but they’re the difference between professional and amateur-looking documents. Take the 30 seconds to set them right.
Quick Reference Cheat Sheet
Page Setup Method: File → Page setup → Enter measurements → OK
Ruler Method: View → Show ruler → Drag gray/white boundary
Keyboard Method: Alt+F → S → Tab → Type → Enter (Windows) Ctrl+Opt+F → Arrow → Enter → Tab → Type → Enter (Mac)
Template Method: Set margins → File → Save as template → Use forever
Standard Measurements:
- Default: 1 inch
- Academic: 1 inch
- Resume: 0.5-0.75 inch
- Letter: 1.25 inch
- Minimum for printing: 0.25 inch
Now go format those documents properly. Your professors, bosses, and printers will thank you.
